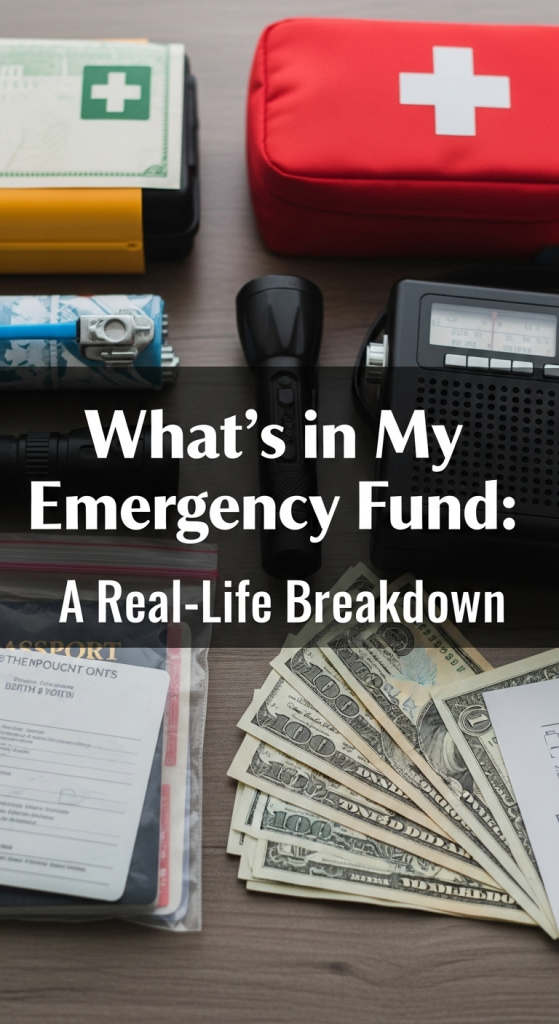
Ever feel that slight panic in your chest when the car makes a weird noise? Or when you hear whispers of company “restructuring”? That feeling is financial anxiety. For years, it was my constant companion. Now, I want to share my solution. Let’s dive into my complete emergency fund breakdown. We will explore what to keep in an emergency fund and clarify how much should be in an emergency fund. This is my real life emergency fund strategy, a transparent guide to building an emergency savings account that buys you something invaluable: peace of mind. This isn’t just about numbers on a screen. It’s about building a financial buffer that lets you breathe easier, knowing you can handle whatever life throws your way. I’m peeling back the curtain to show you exactly how I built mine, where I keep it, and the mistakes I made along the way.
My Emergency Fund Strategy
Before we get into the nitty-gritty numbers, let’s talk philosophy. What is an emergency fund, really? For me, it isn’t an investment. It’s not a tool to get rich. Instead, it is financial insurance I pay to myself. Its primary job is not to grow, but to be there, stable and ready. This is a crucial mindset shift. Trying to squeeze maximum returns from your emergency savings is a rookie mistake I once made. You risk losing the very money meant to save you during a downturn.
My emergency fund strategy centers on three core principles:
- Accessibility: I need to get to this money fast. Not in a week, but today or tomorrow.
- Stability: The value of the fund cannot drop when the stock market panics.
- Separation: It must be mentally and physically separate from my daily spending money.
This fund is my shield. It protects my long-term investments, like my retirement accounts. Without it, a $2,000 car repair might force me to sell stocks at a loss, derailing years of progress. It also protects my mental health. The knowledge that I can cover several months of expenses without an income is the single greatest stress-reducer I have ever implemented in my life. It allows me to make career choices based on opportunity, not desperation. This peace of mind is the fund’s greatest return on investment.
How Much Should Be In an Emergency Fund?
The most common question is always about the amount. You have probably heard the standard “3 to 6 months of living expenses” advice. While it’s a great starting point, it’s also incredibly vague. What are “living expenses”? And should you save for 3 months or 6? Or maybe even 12? The answer is deeply personal. It depends on your job stability, your industry, your dependents, and your personal risk tolerance.
Here is the exact method I used to determine my magic number.
Step 1: Calculating My Bare-Bones Budget
First, I had to define my essential “living expenses.” This is not my normal monthly budget. It’s my survival budget. I asked myself: if I lost my job tomorrow, what are the absolute, non-negotiable bills I must pay to keep a roof over my head and food on the table? This meant ruthlessly cutting out all the extras. No streaming subscriptions, no dining out, no shopping, no vacations. Just the essentials.
I went through my bank statements for the last three months to get an accurate average. Here’s what my bare-bones monthly budget looks like.
TABLE 1: My Bare-Bones Monthly Expense Calculation
| Expense Category | Monthly Cost | Notes |
|---|---|---|
| Housing | ||
| Rent/Mortgage | $1,650 | The biggest and most important bill. |
| Renter’s Insurance | $15 | A non-negotiable to protect my belongings. |
| Utilities | ||
| Electricity | $70 | Based on a yearly average, not just summer. |
| Gas/Heating | $50 | Also based on a yearly average. |
| Water & Sewer | $40 | A fixed city bill. |
| Internet | $50 | Essential for job searching. Non-negotiable. |
| Food | ||
| Groceries | $400 | This is a strict, at-home-only food budget. |
| Transportation | ||
| Car Payment | $0 | I’m fortunate to own my car outright. |
| Car Insurance | $110 | Required by law and essential. |
| Gas/Fuel | $120 | For essential trips like interviews and groceries. |
| Health | ||
| Health Insurance (COBRA est.) | $450 | A high estimate if I lose my job’s plan. |
| Prescriptions | $25 | My regular, necessary medications. |
| Debt | ||
| Student Loans | $0 | Currently on a pause, but would add it here. |
| Credit Card Minimums | $0 | I carry no credit card debt. |
| Total Bare-Bones Monthly Cost | $2,980 | Let’s round up for safety. |
| Rounded Monthly Total | $3,000 | This is my key number. |
As you can see, my “survival” number is $3,000 per month. It’s much lower than my regular spending, but it’s a realistic figure for what I need to stay afloat without drastically altering my core living situation.
Step 2: Choosing My “Months of Safety”
Next came the big decision: how many months of this $3,000 did I need to save? This is where self-assessment is key.
- 3 Months: This is often suggested for people in very stable jobs (like government or healthcare) or in dual-income households where one partner’s job is secure. It feels a little too thin for me.
- 6 Months: This is the classic, most recommended target. It provides a significant cushion for most job searches or unexpected life events. It’s a solid, reliable goal.
- 9-12 Months: This is for people who are self-employed, work on commission, have a very specialized skillset that takes longer to find a new role, or simply have a very low tolerance for risk.
I analyzed my own situation. Then, I work in the tech industry, which can be volatile with layoffs. I am the sole earner in my household. While I feel my skills are in demand, a tough economic climate could easily stretch a job search to four or five months. Therefore, six months felt right. It gave me a strong sense of security without feeling like I had an excessive amount of cash sitting on the sidelines and losing value to inflation.
The Final Number: A Real Life Emergency Fund Target
The math was simple from there.
$3,000 (Bare-Bones Monthly Expenses) x 6 (Months of Safety) = $18,000
My target emergency fund is $18,000. Seeing that number written down was both intimidating and motivating. It felt huge, but it was also a concrete goal I could work towards. This single figure became the foundation of my entire savings plan. For years, I was just saving randomly. Now, I had a specific destination.
What to Keep in an Emergency Fund
Okay, so I have my target: $18,000. The next question is a practical one: where do you actually put it? Shoving $18,000 under the mattress is a terrible idea. Keeping it all in a regular checking account is also a bad move, as it’s too easy to spend and earns virtually no interest. I needed a better system.
After a lot of research and some trial and error, I developed a tiered system. This emergency fund breakdown helps me balance the need for immediate access with the desire to earn some interest to fight inflation. I split my $18,000 fund into two main tiers, with a potential third tier for more advanced savers.
Tier 1: The “Immediate Access” Fund (1 Month’s Expenses)
This is my first line of defense. It’s for true, right-now emergencies. Think of a burst water pipe on a Saturday night, an emergency vet visit, or a sudden flight needed for a family crisis. This money needs to be liquid. I need to be able to access it within 24 hours, no questions asked.
- Amount: $3,000 (1 month of my bare-bones expenses)
- Location: A High-Yield Savings Account (HYSA) at an online bank.
- Why an HYSA? The interest rates are significantly higher than traditional brick-and-mortar banks. While it’s not making me rich, it might earn enough to buy a nice dinner once a year, which is better than nothing.
- Why an online bank separate from my main checking account? This is a crucial psychological trick. By keeping it at a different institution, I have to consciously initiate a transfer. It takes 1-2 business days to arrive. This slight “friction” prevents me from dipping into it for non-emergencies, like a flash sale or a weekend getaway. It forces me to pause and ask, “Is this really an emergency?”
This tier is my rapid-response team. It’s ready to go at a moment’s notice.
Tier 2: The “Big Blow” Fund (5 Months’ Expenses)
This is the bulk of my fund. It’s designed to handle the life-altering events, primarily job loss or a significant medical issue that prevents me from working. Since this money might not be needed for months or even years, I can afford for it to be slightly less liquid than Tier 1 in exchange for security and, ideally, a slightly better return.
- Amount: $15,000 (5 months of my bare-bones expenses)
- Location: This is where you have a few options. I personally split this tier.
- $10,000 in another HYSA: I keep the majority in another high-yield savings account, separate from both my checking and my Tier 1 account. It’s still safe, liquid within a couple of days, and earns a competitive interest rate.
- $5,000 in a No-Penalty CD: A Certificate of Deposit (CD) usually locks your money away for a set term. However, a “no-penalty” CD allows you to withdraw the money early without forfeiting your interest. They often offer a slightly higher interest rate than an HYSA, making them a good option for money you hope not to touch. It’s a small optimization, but it helps.
Some people also consider Series I Savings Bonds (I Bonds) from the U.S. Treasury for this tier. They offer excellent inflation protection. However, you cannot cash them out for the first 12 months, which makes them unsuitable for a brand-new fund. After the first year, they are a fantastic option for a portion of your “Big Blow” fund.
Here’s a table summarizing my two-tier system for my real life emergency fund.
TABLE 2: My Tiered Emergency Fund Breakdown
| Tier | Name | Purpose | Amount | Location | Accessibility |
|---|---|---|---|---|---|
| Tier 1 | Immediate Access | Small, urgent emergencies (car repair, vet bill) | $3,000 | High-Yield Savings Account (Online Bank) | 1-2 Business Days |
| Tier 2 | The Big Blow | Job loss, major medical event | $15,000 | HYSA & No-Penalty CD | 2-3 Business Days |
| Total | Complete Financial Shield | $18,000 | Multiple Accounts | Strategically Staggered |
This tiered structure gives me the best of both worlds. I have immediate cash for small fires and a larger, slightly-less-accessible reserve for major catastrophes. This is a robust emergency fund strategy that has served me well.
Building an Emergency Savings Account From Scratch
Reading about an $18,000 fund is one thing. Actually building an emergency savings account of that size is another. It didn’t happen overnight. It was a slow, deliberate process that took me just over two years. If you’re starting from zero, please don’t be discouraged. The most important step is simply to start.
Starting Small, Staying Consistent
My first goal wasn’t $18,000. It was $1,000. This is often called a “starter” or “baby” emergency fund. The psychology here is powerful. A $1,000 buffer can stop most small financial problems from becoming debt-fueled disasters. It can cover a new set of tires or a plumbing repair without you having to reach for a credit card.
I started by setting up an automatic transfer of just $50 a week from my checking account to my new HYSA. That’s it. It was an amount I knew I wouldn’t miss. Some weeks, if I had extra cash, I’d throw in another $20 or $30. It took me about five months to hit that first $1,000. Hitting that milestone was a massive confidence boost. I had proven to myself that I could do it. From there, I got more aggressive.
Automating My Savings
Consistency is more important than amount. The single most effective tool for building my emergency fund was automation. I treated my savings like a bill. On the same day I got paid, a set amount was automatically transferred to my emergency savings. I never even saw it in my checking account. This is the essence of “paying yourself first.”
- Step 1: I calculated how much I could realistically save per paycheck after hitting my $1,000 goal. I settled on $300 per paycheck (I get paid bi-weekly).
- Step 2: I logged into my payroll provider and set up a direct deposit split. This was a game-changer.
- Step 3: I directed $300 of every paycheck to go directly into my Tier 1 HYSA. The rest of my paycheck went to my checking account as usual.
By automating it, I removed willpower from the equation. The savings grew steadily in the background without any active effort on my part. Once my Tier 1 account was full at $3,000, I simply changed the direct deposit destination to my Tier 2 HYSA.
The “Found Money” Rule
To speed things up, I created a personal rule: all unexpected or “found” money went straight into the emergency fund. This turned saving into a fun game.
What counts as “found money”?
- Tax Refunds: My entire federal tax refund went directly into the fund.
- Cash Back Rewards: I let the cash back from my credit cards accumulate and deposited it once a year. This was often a few hundred dollars.
- Selling Old Stuff: I decluttered my apartment and sold old electronics, furniture, and clothes online. Every dollar went into the fund.
- Raises or Bonuses: When I got a raise at work, I kept my lifestyle the same and diverted the entire “new” money from my paycheck into savings for the first six months.
This approach turbocharged my progress. The combination of slow, steady automation and occasional large deposits from “found money” helped me reach my $18,000 goal much faster than I initially thought possible.
Real-Life Emergency Fund Examples
An emergency fund can feel like an abstract concept until you actually need it. I’ve unfortunately had to tap into mine a few times. While it’s never fun to see the balance go down, these moments reinforced the incredible value of having that cushion. These are some of my emergency savings examples.
The Unexpected Vet Bill
My dog, Cooper, is part of my family. One evening, he became very sick, very suddenly. A panicked trip to the 24-hour emergency vet revealed he had swallowed something he shouldn’t have and needed immediate surgery. The estimate was a shocking $2,200.
In the past, this would have been a credit card disaster. I would have been stressed about the bill on top of being worried about my dog. But this time was different. I calmly told the vet to proceed. I went home, transferred the $2,200 from my Tier 1 HYSA to my checking account, and paid the bill in full when I picked him up the next day. The fund did its job perfectly. It absorbed the financial shock, allowing me to focus entirely on Cooper’s recovery. The very next payday, my top priority was starting to refill that Tier 1 account.
The Sudden Car Breakdown
I was driving to a friend’s house when my car’s transmission suddenly gave out. The tow truck and the mechanic’s diagnosis came with a hefty price tag: $1,600 for the repair. My car is essential for me to get to work. This was not an optional expense.
Again, the process was stress-free. I approved the repair without hesitation. As such, I used my Tier 1 fund to cover the cost. I didn’t have to take on debt or ask family for money. I just handled it. This is the freedom an emergency fund provides. It turns a potential crisis into a mere inconvenience.
A Near Miss: The Job Scare
This is an example of when I didn’t have to use the fund, but its existence was invaluable. About a year ago, my company went through a major round of layoffs. For two weeks, nobody knew who was safe. The anxiety in the office was palpable. My colleagues were panicking, wondering how they would pay their rent if they got the bad news.
I was nervous, of course. Nobody wants to lose their job. However, I wasn’t terrified. I remember sitting at my desk and doing the math in my head. “$18,000 in the bank… that’s 6 months of survival.” The knowledge that I had a six-month runway to find a new job completely changed my perspective. It allowed me to stay calm and focused. Thankfully, I was not laid off. But that experience was the ultimate proof of my fund’s worth. It wasn’t just a safety net for my finances; it was a safety net for my sanity.
Mistakes I Made (So You Don’t Have To)
My journey wasn’t perfect. I made several mistakes while figuring out the best emergency fund strategy. Learning from them will hopefully save you some time and trouble.
Keeping It in My Checking Account
When I first started saving, I just let the money pile up in my primary checking account. This was a huge mistake. Because it was so easy to see and access, it never felt like “emergency” money. It just felt like a large checking balance. I found myself “borrowing” from it for non-emergencies, like a weekend trip or a new gadget, with the vague promise to pay it back later. The fund never grew because it was constantly being raided. Moving the money to a separate, dedicated HYSA was the single best change I made. Out of sight, out of mind.
Investing It Too Aggressively
After I had saved about $10,000, I started getting impatient. I saw the money sitting there earning very little interest while the stock market was booming. I thought, “I can do better.” So, I moved a large chunk of it into a conservative stock market index fund.
A few months later, the market had a sharp 15% correction. My $10,000 emergency fund was suddenly worth only $8,500. I was horrified. What if I had been laid off at that exact moment? I would have been forced to sell my investments at a huge loss to get the cash I needed. It was a harsh lesson: the primary purpose of an emergency fund is preservation, not growth. I immediately sold the fund (at a small loss) and moved the money back to the safety of an HYSA.
Forgetting to Refill It
The first time I used my fund for that vet bill, I felt so relieved that I forgot the most important final step: making a plan to replenish it. My fund was down to just under $1,000 in Tier 1. A few weeks went by, and I just got used to the lower balance. It was a dangerous habit. An emergency fund is a living thing. When you use it, you must make a conscious effort to build it back up. Now, after any withdrawal, I immediately adjust my budget to aggressively refill the used portion. I treat it like a debt I owe to my future self.
Your Financial Foundation Awaits
Building an emergency fund is not the most exciting part of personal finance. It doesn’t have the thrill of picking a winning stock or the satisfaction of paying off a huge debt. But it is, without a doubt, the most important. It is the bedrock upon which all other financial goals are built. It is the security that allows you to take calculated risks, to weather storms, and to sleep soundly at night.
My real life emergency fund breakdown of $18,000, split across tiered accounts, is what works for me. Your number and your strategy might be different. You might need more, or you might need less. You might prefer the simplicity of one big HYSA instead of a tiered system. That’s perfectly fine. The goal of this article is not for you to copy me exactly. The goal is to show you that it’s possible and to give you a clear framework to build your own.
Don’t be intimidated by the final number. Focus on the first step. Open that separate savings account today. Set up an automatic transfer for next payday, even if it’s only for $10. The momentum you build from that single action will be more powerful than you can imagine. You are building more than an emergency savings account; you are building a future with less stress and more freedom. Start today.

Add your first comment to this post